Fixing Leaky Pipes: A Comprehensive Guide to Resolving Plumbing Woes
Fixing Leaky Pipes: A Comprehensive Guide to Resolving Plumbing Woes
Welcome to our comprehensive guide on fixing leaky pipes. Leaky pipes can be a common plumbing issue that, if left unattended, can lead to water damage, mold growth, and increased utility bills. In this article, we will explore the causes of leaky pipes, discuss the importance of timely repairs, and provide you with step-by-step instructions to fix those pesky leaks and restore the integrity of your plumbing system.
Understanding Leaky Pipes: Identifying the Problem
Leaky pipes can occur in various areas of your plumbing system, including water supply lines, drain pipes, or fixtures. Here are some common causes of leaky pipes:
- Corrosion: Over time, pipes can corrode due to the chemical reactions between the water and the pipe material. Corrosion weakens the pipe walls, leading to leaks.
- High Water Pressure: Excessively high water pressure can strain pipe joints, causing them to leak. A pressure regulator can help mitigate this issue.
- Temperature Changes: Extreme temperature fluctuations can cause pipes to expand and contract, leading to loose connections and leaks.
- Pipe Joints and Fittings: Faulty or loose pipe joints and fittings are a common source of leaks. Over time, these connections can deteriorate or become loose, causing water to seep out.
The Importance of Timely Pipe Repairs
Addressing leaky pipes promptly is crucial to prevent further damage and costly repairs. Here are a few reasons why timely repairs are essential:
- Water Damage Prevention: Leaky pipes can cause water to seep into walls, floors, and ceilings, leading to structural damage, mold growth, and compromised indoor air quality. Prompt repairs can prevent extensive water damage and the associated health risks.
- Energy Efficiency: Leaks contribute to wasteful water usage, leading to increased utility bills. Fixing leaks helps conserve water and promotes energy efficiency in your home.
- Preserving Property Value: Water damage resulting from leaky pipes can significantly impact the value of your property. Regular maintenance and timely repairs demonstrate your commitment to protecting the integrity and value of your home.
Step-by-Step Guide to Fixing Leaky Pipes
Now let’s dive into the steps involved in fixing leaky pipes. Please note that these instructions are general guidelines and may vary depending on the specific plumbing configuration in your home. If you are unsure or uncomfortable performing these tasks, it is recommended to consult a professional plumber.
Materials You Will Need:
- Pipe wrench or adjustable pliers
- Pipe cutter or hacksaw
- Replacement pipe or fittings
- Pipe sealant or plumber’s tape
- Bucket or towels to catch water
- Turn off the Water: Locate the main water supply valve and turn it off to stop the flow of water to the affected area. Open a nearby faucet to drain any remaining water in the pipes.
- Assess the Leak: Examine the leaky pipe to determine the extent of the damage and identify the specific area that requires repair. Dry the pipe thoroughly with a towel.
- Prepare the Pipe: If the leak is near a joint, inspect the fittings for any signs of damage or wear. Tighten loose fittings with a pipe wrench or adjustable pliers. If the leak is along the pipe itself, measure the damaged section and mark it for removal.
- Cut the Pipe: Use a pipe cutter or hacksaw to remove the damaged section of the pipe. Ensure that the cut is clean and smooth. If necessary, remove any burrs or rough edges with a file.
- Install the Replacement Pipe or Fittings: Measure and cut a replacement pipe or obtain new fittings that match the pipe’s diameter and material. Apply pipe sealant or plumber’s tape to the threads of the fittings for a secure connection.
- Assemble the New Pipe or Fittings: Connect the replacement pipe or fittings to the existing plumbing system, following the manufacturer’s instructions. Use a pipe wrench or adjustable pliers to tighten the connections firmly.
- Turn on the Water: Slowly turn on the main water supply valve and check for any leaks. If no leaks are present, open the nearby faucet to flush the pipes and remove any air pockets.
- Monitor for Leaks: After completing the repair, keep a close eye on the repaired area for a few days to ensure there are no additional leaks or issues. If any problems persist, it is advisable to contact a professional plumber for further assistance.
By following these step-by-step instructions and addressing Leaky pipes promptly, you can prevent further damage and maintain the integrity of your plumbing system.
Call Us:
561-692-6002
GET FREE ESTIMATE!
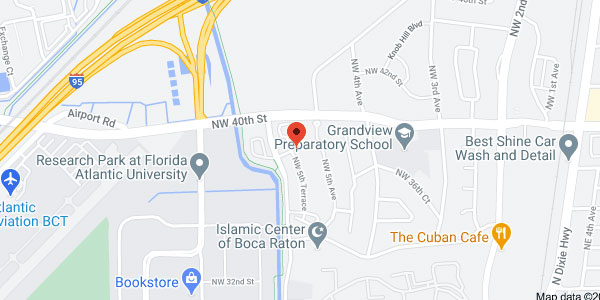
Our Location:


Submit your review | |